Hello everyone,
I am back with a new post after quite a long break.
As many of you know, the EchoLink system I set up in 2024 for the Kapaklı Branch of the Turkish Radio Amateurs Association (TRAC) – YM1KPL – was working flawlessly on a fiber internet infrastructure. During that initial setup process, I had struggled quite a bit with the plague of CGNAT, which forced me to obtain a static IP and deal with complex port forwarding configurations. We had successfully completed the testing phases, but later, due to a change in location, we were forced to run the system over a 4.5G mobile network.
We managed to get the system back up on 4.5G by going through the familiar processes of port forwarding and such. However, this time we hit a different wall. The “node firewall” issues that didn’t cause problems on fiber became a major headache on the mobile network. We started experiencing annoying problems like connection drops, audio cutouts, or being completely unable to log in, especially on days with busy nets.
No matter how many fine-tuning attempts I made, I unfortunately couldn’t overcome this issue with the existing structure. But I was determined to find a solution. As a result of my research, a single definitive solution appeared before me: EchoLink Proxy.
Initially, I thought about hosting the proxy server on a Raspberry Pi at my home. However, the cost of the static IP I would need for my home was almost identical to the cost of renting a server. Therefore, I decided to solve the problem at its root by renting a cloud server (VPS), which I believed would be more stable and uninterrupted.
Now that we’ve moved past the story part, let’s get to the critical question that my readers will truly wonder about: Why exactly is it that EchoLink does not work stably on networks like 4.5G? To understand this deeply, we first need to grasp what the building blocks of the internet—the TCP and UDP protocols—actually are.
Internet Protocols
The IP packets we use when transferring data over the internet need a transport layer. These layers are what we call UDP and TCP.
UDP (User Datagram Protocol): This is a connection type designed for real-time streams like voice and video. It doesn’t really ask “Who are you?” or “What are you?” It works with a “send and forget” logic. After sending the packet, it doesn’t check whether the other party received it or not. We can think of these like old-school courier companies; they throw the package at the door, run away, and never look back.
TCP (Transmission Control Protocol): This is a connection type designed for situations where data integrity is everything, such as banking or file downloads. It has an official protocol called the “three-way handshake,” and the process works like this:
- SYN: “Can we connect?”
- SYN-ACK: “Yes, I’m ready, come on in.”
- ACK: “Okay, I’m coming.”
TCP waits for an acknowledgment (ACK) from the other party for every packet it sends. If that acknowledgment doesn’t arrive, it considers that packet lost and sends it again. It controls the packets strictly. If the 2nd packet arrives before the 1st by mistake, it reorders them correctly. You can think of these as new-generation, meticulous courier companies; they call you, ask if you are home, and request a delivery code.
Now, let’s look at how Internet Service Providers (ISPs) treat packets in these two protocols. If you expect them to treat them the same way, you are unfortunately mistaken.
The Situation in Fiber Optic Infrastructure
Fiber is an environment where bandwidth is relatively comfortable and wide. However, even here, CGNAT (Carrier-Grade NAT) and Stateful Firewalls come into play. TCP: For the ISP, TCP traffic is “valuable” traffic. Banking transactions, surfing the web (those who used the internet in the 90s, I see your teary eyes😢), and file transfers are all done over TCP. When a TCP connection is established, the ISP’s router saves that session in its memory and respects it. UDP: On fiber, UDP is generally left free for gaming, video conferencing, and VoIP. However, if you don’t have a static IP, the router in the CGNAT pool drops UDP packets into timeout very quickly. If no data is transferred for 30-60 seconds, the port mapping on the ISP side is deleted, and your connection enters “ghost mode”—meaning it drops.
The Situation in 4.5G Infrastructure
This is the front where the real war is fought. In mobile networks, bandwidth is extremely precious, and thousands of devices must share the resources of the same base station. For this reason, ISPs follow a much more aggressive policy on the mobile side. TCP: TCP knows its manners; it’s polite. Because there is a handshake, a formal entry is opened in the firewall for every incoming packet. If the base station gets congested, TCP detects this and automatically reduces the packet transmission speed. Operators love this “compliant” feature and generally do not interfere with TCP traffic. UDP: In 4.5G networks, UDP traffic is usually placed in the “Best Effort” class, meaning it’s treated like an unwanted stepchild. The moment the base station gets congested, ISP sistemleri start by throttling UDP packets or throwing them directly into the trash. Also, because UDP packets are small and in a constant stream, the operator’s security systems might perceive this as a DDOS attack or inefficient/undefined traffic. Additionally, the firewall is very aggressive in these networks to protect mobile device batteries and ensure network security; they place extreme importance on not leaving open ports. Even if you get a static IP, even if you completely turn off the firewall at your own modem layer, the firewall at the operator layer can filter incoming (inbound) UDP packets as unsolicited traffic. In fact, if it sees a constant entry from one port via DPI (Deep Packet Inspection), it might perceive this as an attack attempt and block that port entirely.
EchoLink Ports
EchoLink normally works as a “Peer-to-Peer” (end-to-end) system. When you connect to a station, voice packets go back and forth directly between your computer and the other party’s computer. For this, EchoLink uses the following ports:
- UDP 5198 and 5199: For voice packets and instant data exchange.
- TCP 5200: For registration with the server and control operations. If we lived in an ideal world, everything would work perfectly. But as I explained above, in the real world, UDP becomes a nightmare for us. The aforementioned ISP restrictions and most corporate firewalls block UDP traffic by default to ensure security and only allow standard TCP traffic.
Now, if you’ve asked the question, “So what is EchoLink trying to do? Why does it insist on using UDP instead of TCP for voice transmission despite knowing these problems?” believe me, you are not alone. There is only one reason why EchoLink (and almost all real-time voice applications) insists on using UDP: Latency. When you perform a TX (send voice) with UDP, the system sends the packet with a “BANG”—straight to the target. It doesn’t handshake; it doesn’t waste time checking if it arrived. What would happen if it used TCP instead of UDP? In the slightest momentary fluctuation in internet speed or packet loss, TCP would stop the entire audio stream to request that tiny lost voice packet again. This would cause 1-2 second stutters in the audio, followed by the accumulated audio arriving sped up (like “Mickey Mouse”). Those who used Skype or MSN for voice calls back in the day know this feeling very well; it probably just rang in your ears as you read it 😊.
So, what are we going to do? Are we just going to accept defeat? Of course not. Here is the solution: EchoLink Proxy. After our “Networking 101” lesson above, I won’t dive too deep into the technical depths of a proxy, but I’ll give a brief explanation so as not to break the flow of the article. You can think of a proxy as a lightened and specialized version of a VPN. A VPN takes the original data packets and hides them inside another protocol (usually TCP) that the operator (ISP) sees as “secure” or “familiar.” Thus, it bypasses the ISP’s UDP blocking and DPI filtering. It allows you to exit to the outside world not with your own IP, but with the IP of the server at the other end of the tunnel. While doing this, a VPN encrypts the packets passing through the tunnel. We can think of this encryption like putting the packet inside 10 different safes, one inside the other, like Matryoshka dolls. While this system provides great privacy, the encryption/decryption process takes time, which increases the latency (ping time)—our greatest enemy in EchoLink. For this reason, encryption is not used in EchoLink Proxy; the goal is simply to change the protocol.
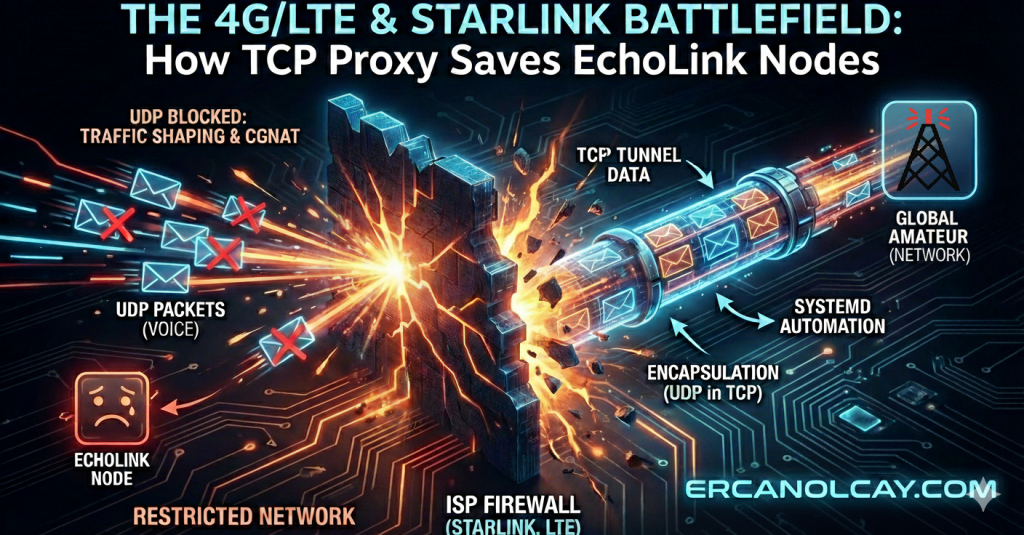
So, what exactly are we doing with EchoLink Proxy? We take all the packets going to and from UDP 5198, 5199, and TCP 5200, melt them into a single pot, and send/receive them over TCP port 8100. How so? Normally, what did we say? Voice exchange is done over UDP ports 5198 and 5199. However, thanks to this proxy, we take those “problematic” packets coming from UDP 5198 and 5199 and put them inside a secure “TCP envelope.” So, how does this process of putting a UDP packet into a TCP envelope (technically called Encapsulation) work?
Under normal conditions, it says “I am UDP, I am going to such-and-such port” on the EchoLink voice packets. However, when the ISP firewall sees this packet, it says “You are unclaimed and untrustworthy,” throwing it to the back of the line or directly into the trash if the base station is busy. When we use a proxy, the process works like this: Your EchoLink software still produces a normal voice packet (UDP). The Proxy software on your side (or the proxy client within EchoLink) catches this UDP packet and adds a TCP header to it. Now, an ISP or Firewall looking from the outside doesn’t see a UDP packet containing voice; it sees a formal, “well-mannered” TCP packet that looks like a banking transaction or secure web page traffic. The firewall says, “Ah, this is TCP, meaning important data, I shouldn’t lose or block this,” and safely delivers the packet to the target (the server we rented). When the packet reaches our rented server, the Proxy software on the server rips off that fake TCP envelope, takes out the original UDP packet, and delivers it “fresh and intact” to EchoLink’s main servers or the station you are connected to.
Let’s also clear up a possible confusion here: “So, will other EchoLink stations connect to my setup or will they go to the server I rented?” The detailed answer is as follows: An operator sees your callsign in the EchoLink list (for us, YM1KPL-R) and clicks the “Connect” button. EchoLink’s main servers (Directory Servers) direct that operator not to your 4.5G modem, but to the IP address of the Proxy Server you rented. In other words, the other operator technically connects to your server. The server acts like a “Receptionist” here. it meets the incoming voice packets at the door. The server immediately packages those packets it receives from the other side into the “TCP envelope” we mentioned and sends them through that special, uninterrupted tunnel previously established with your modem. Your EchoLink setup at home opens this envelope coming from the server and transfers the voice to the speaker or radio. The process continues uninterrupted in this way.
Installation
Now that we’ve handled the theoretical part, we can move on to the practical stage: renting a server. The minimum system requirements for EchoLink Proxy are quite low:
- 1 vCPU (Even the lowest processor is enough)
- 1 GB RAM (Actually 512MB is enough, but 1GB keeps things comfortable)
- 10-20 GB Disk (It will only keep logs and host a small application) You can rent a “VPS” (Virtual Private Server) from any company that meets these requirements. The most important point to consider here is that the location of the server you rent should be the same as the country where your EchoLink setup is located. If the setup is in Turkey and you rent the server from Germany, you will experience an extra 100-200 ms delay during the round trip of the audio, which leads to PTT lag.
After renting the server, we need to decide on the operating system. I continued with Debian, a Linux distribution I’ve used for years, known for its stability and my own familiarity. You can choose different Linux distributions like Ubuntu or CentOS if you wish. Since EchoLink Proxy runs on Java, it will work healthily on all platforms that support Java. After setting up the server, we must establish a remote connection to the server using the SSH (Secure Shell) protocol. Linux and macOS users can do this directly using the terminal, while Windows users can use a tool like PuTTY.
After setting up the server, we need to establish a remote connection using the SSH (Secure Shell) protocol. Linux and macOS users can do this directly through the terminal, while Windows users can use a tool like PuTTY to facilitate this connection.
After logging into the server via SSH, the very first task we must perform is creating a Swap Area. Swap acts as a “backup warehouse” that comes to the rescue of the operating system whenever the physical RAM (main memory) becomes full. It is essentially the insurance policy for low-RAM servers. While 1 GB of RAM might seem sufficient for the EchoLink Proxy, we need a “safety valve” to prevent the system from locking up during unexpected moments—such as a sudden spike in Java’s memory usage. Since we have a 10-20 GB disk, sacrificing 2 GB of that space is a very wise move.
# Create an empty 2GB file
sudo fallocate -l 2G /swapfile

# Restricting file permissions to system-only access (Security!).
sudo chmod 600 /swapfile

# Format the file as swap space
sudo mkswap /swapfile

# Activate the swap area immediately
sudo swapon /swapfile

# Add this to the fstab file to make the setting permanent (so it survives a reboot)
echo '/swapfile none swap sw 0 0' | sudo tee -a /etc/fstab
The order of operationNext, after updating the system, we will install the required Java package because the EchoLink Proxy runs on Java. Following that, we will install the “UFW” (Uncomplicated Firewall) package to manage port-opening procedures more practically and efficiently. Although the Linux world offers various powerful firewall tools such as iptables, nftables, and firewalld I chose UFW because its syntax is far more straightforward and easier to understand. Finally, we install the “Unzip” package. We need this because the EchoLink Proxy software is provided in a compressed .zip format on the official website, and we must be able to extract it on the server is as follows:
# Updating the system.
sudo apt update && sudo apt upgrade -y

# Installing Java, Unzip, and UFW packages.
sudo apt install default-jre unzip ufw -y

# Creating a dedicated folder for the EchoLink Proxy.
mkdir ~/echolink-proxy

# Navigating into the folder we created.
cd ~/echolink-proxy

# Downloading the Proxy package from the official source to the server.
wget https://www.echolink.org/downloads/EchoLinkProxy_1_2_3.zip

# Extracting the downloaded files (this will produce EchoLinkProxy.jar and ELProxy.conf).
unzip EchoLinkProxy_1_2_3.zip
Our EchoLink Proxy files are ready, but before we run them, we have some critical port-opening and configuration file update steps to complete. First, let’s handle the port-opening (firewall) procedures.
Attention! Before making changes to port permissions with UFW, the first rule is that we must absolutely secure our SSH access. If you activate UFW without typing the first command below, you will cut your own connection to the server and be locked out.
# We protect our connection by allowing SSH access.
sudo ufw allow ssh

# We open the main port (TCP 8100) that we will use for the proxy tunnel connection.
sudo ufw allow 8100/tcp

# We open the relevant original ports for voice packets from other operators and EchoLink servers.
sudo ufw allow 5198:5199/udp
sudo ufw allow 5200/tcp

# After defining the rules, we start the firewall.
sudo ufw enable
Now, it’s time to fine-tune the EchoLink Proxy. We will open the configuration file with a text editor using the following command:
sudo nano ELProxy.confThe details of the important settings on the screen and what they do are as follows:
- Password: This is the most critical part. If you leave this as the default PUBLIC, any EchoLink user in the world can use your server as a free proxy, passing their traffic through you. For personal use, you must write a strong, hard-to-guess password here. Note this password down; we will use it later in our EchoLink software.
- Port: The default is 8100. On Linux systems, if you want to use ports below 1024 (e.g., 80, 443), you must run the application with root privileges. 8100 is ideal as it is both standard and trouble-free; there is no need to change it.
- BindAddress: If the server you rented has more than one network interface or IP address, this allows the proxy to listen only to tunnel requests coming from a specific IP. If you leave it as 0.0.0.0, it accepts requests from all IPs on the server, which is generally fine.
- ExternalBindAddress: This is for more complex network structures. It is used if one side of the server faces a local network (LAN) and the other side faces the internet (WAN). For those of us using a standard single-IP VPS, it should remain 0.0.0.0.
- PublicAddress: If your server is behind a NAT (which is usually not the case for VPS) and the wrong local IP appears on the EchoLink status page instead of your real IP, you can manually type your server’s external (public) IP here. It is for display purposes only and does not affect operation.
- ConnectionTimeout: Determines how long a device (phone or PC) connected to the proxy can stay in the tunnel, whether there is an active EchoLink call or not. If you set this to 0, the tunnel stays open forever until you cut the connection. For an uninterrupted node, 0 is ideal.
- RegistrationName: If you write your callsign here, your server will be registered in the public “Proxy List” on the EchoLink website. You can use this if your server IP address is dynamic and you want to find your server easily; otherwise, you can leave it blank.
- RegistrationComment: A short note that will appear next to the callsign in the registration list. (e.g., “Ercan 4.5G Private Proxy”).
- Security Settings (RegEx): You can filter who can use your server in great detail using Regular Expressions:
- CallsignsAllowed: This is your White-list. It only allows specific people. For example, if you type TA1TEC | TA1NDA, only stations with these two callsigns can use your server, even if others know the password.
- CallsignsDenied: This is your Black-list. It bans specific people. For example, if you type -L$|.-R$ you prevent all stations ending in “-L” (Link) and “-R” (Repeater) from using your proxy, allowing only individual users.
We have detailed the definitions. For those who don’t want to get into the nitty-gritty, the basic settings required for the operation and security of the system are as follows (you can leave the others as default):
Password=YourStrongPassword
Port=8100
ConnectionTimeout=0
# Only allow your own node to connect, so others cannot enter even if they know the password. CallsignsAllowed=YourNodeCallsign (e.g., YM1KPL-R)
After entering these values, we save and exit the configuration file by pressing CTRL+X, then Y, and finally Enter. If we haven’t made any mistakes, we shouldn’t need to touch this file again.
Technically, everything is ready at this point. We could run the proxy software manually. However, in its current state, the EchoLink Proxy will not restart on its own after a power outage or a server reboot. You would have to start it manually every single time.
To ensure the proxy starts automatically every time the server boots and runs in the background as an “immortal” service, we need to create a systemd service.
But why bother creating a seemingly more complex systemd service when we could simply write a single line of command with @reboot in crontab?
The answer is simple: Stability and Control. Crontab only triggers the program once at boot, and its job is done. If Java throws an error and crashes during startup, or if the program shuts down for any reason during operation, crontab won’t have a clue. Your EchoLink Proxy would remain offline until you personally notice it and restart the server.
Systemd, on the other hand, acts like a “watchman.” It monitors the program constantly. If the program crashes, systemd detects this and automatically restarts it according to the rules we define. Furthermore, crontab runs the command the second the server opens, but at that moment, the internet connection might not be active or the IP address might not be assigned yet. In such a case, EchoLink Proxy would fail. By adding the After=network.target command to systemd, we can essentially say: “Wait, do not run this program until the internet connection is fully ready.” Additionally, tracking what’s happening in the background with crontab is difficult and requires extra logging setup. Systemd automatically logs all outputs and provides a much more professional management interface.
Now, let’s create the service file required to keep the EchoLink Proxy alive under all conditions:
sudo nano /etc/systemd/system/echolink-proxy.service
Paste the following code block entirely into the empty editor:
[Unit]
Description=EchoLink Proxy Server Service
# Start only after the internet connection is ready
After=network.target

[Service]
# The directory where the files are located (Adjust if your path is different)
WorkingDirectory=/root/echolink-proxy
# The command to be executed (Full path to Java and the name of the JAR file)
ExecStart=/usr/bin/java -jar EchoLinkProxy.jar
# Automatically restart the service in case of any error or crash
Restart=always
# Wait 5 seconds before restarting (To avoid overwhelming the system)
RestartSec=5
# Settings to direct logs to the standard system log
StandardOutput=syslog
StandardError=syslog
SyslogIdentifier=echolink-proxy

[Install]
# To run in multi-user mode (standard server boot)
WantedBy=multi-user.target
After pasting the code, let’s save and exit by pressing CTRL+X, then Y, and Enter. Now, we need to register and start this new service in our system:
# 1. Notify systemd that we have added a new service file and reload the configuration.
sudo systemctl daemon-reload

# 2. Enable the service at startup (so the server starts it automatically on every boot).
sudo systemctl enable echolink-proxy

# 3. Start the service immediately.
sudo systemctl start echolink-proxy

# 4. Finally, check the status to ensure everything is running correctly.
sudo systemctl status echolink-proxy
If you see the text active (running) in green on your screen after that last command, congratulations! No matter how unstable your 4.5G connection might be, you now have a professional proxy server standing behind it, as solid as a rock.
We have successfully finished our work on the server, and our service has begun running in the background. Now, it’s time to introduce this new tunnel to the EchoLink software on your radio or computer:
- Open the EchoLink program and go to Tools > Setup from the top menu.
- Go to the Proxy tab in the window that opens.
- Check the “Use Specific Proxy” option.
- Host: Enter the IP address of your server where the EchoLink Proxy is running.
- Port: Leave it as 8100 if you didn’t change it in the configuration file.
- Password: Enter the strong password you set in the
ELProxy.conffile. - Click OK to save the settings.
If everything was done correctly, EchoLink will connect to the main server list through the tunnel, and a small icon will appear next to your callsign indicating that you are using a proxy. Success! Now, aggressive 4.5G network restrictions, CGNAT hurdles, or discarded packets are no longer an issue for you. Thanks to this digital bridge you’ve built:
- Your voice packets will be seen as “valuable TCP traffic” by the ISP and prioritized.
- Connection drops will be minimized.
- Especially during busy nets, the issue of audio speeding up like “Mickey Mouse” or cutting out entirely will be a thing of the past.
Yes…
Thank you for sticking with me until the end of this long post. I hope to meet again in days where we don’t have to bypass constraints and barriers placed in front of communication, and where we can focus solely on the excitement of creating technology.
Ercan, 2026.